
Erkor
-
Content Count
300 -
Joined
-
Last visited
-
Days Won
16
Posts posted by Erkor
-
-
NPCs have a variety of movement types as far as I remember; we can spawn waypoints already and make NPCs move along them, but wandering is something NPCs on Epsilon can't do. For the people who don't know what that means: "Wandering" is a state that makes NPCs move in a certain area (determined by a radius? dunno) as generic critters would on Retail WoW. You might ask yourself why that's useful, but being able to set NPCs to wander in a zone allows you to set up critters and wild animals so much more easily. Ordinarily, you'd have to make a few tens or dozens of waypoints to make proper use of it.
-

necromancy bump because i dont want to make a thread for the exact same thing and i would love to hear an actual yes/no about this
-
37 minutes ago, Abaddon88 said:At least 2 weeks past. Still no fixes
yeah thats terrible and all but its one guy working on it buddy unless youd like to take the entire workload on by urself
-
-
the ability to make actual teleports in game was intentionally not given to players
use .phase teleport add in your own phase instead because it does the exact same thing but is restricted to phases you own/are officer in
-
hello
patch updated
changel og:
*removed hair 00_01, dark gray
*replaced 00_08 with the SL black
hair
*fixed the brooch
=D redownload the patch =D
-
bold lelf hair varities
(elpsilon combatible)
i found this fro msome one else (@Dove) an d all the circlets were broken so i fixed i t
changes basically every hair texture to something slightly different (for blood elves)
please Enjoy : ) ) )
extract into Patches folder (⌐■_■)
-
orcs generally dont have eyebrows and the only one th at comes to mind is thrall who has them for ??? reason
i mean i wouldnt care much but itd be kind of cursed
-
you can assign announce to a specific game channel (e.g. battleground horde) and disable it in your general tab
-
DOWNLOADThIS
-
i like the majority of the sounds but polearms are a bit depressing
also, your compressed file is a .rar. i think you should .zip it so that people can download it and directly install it via the launcher
-
(:<
thank u razmataz i will pray for good programming
-
I reported this in the game support channel once but didn't think more of it after I couldn't replicate it.
The time has come.
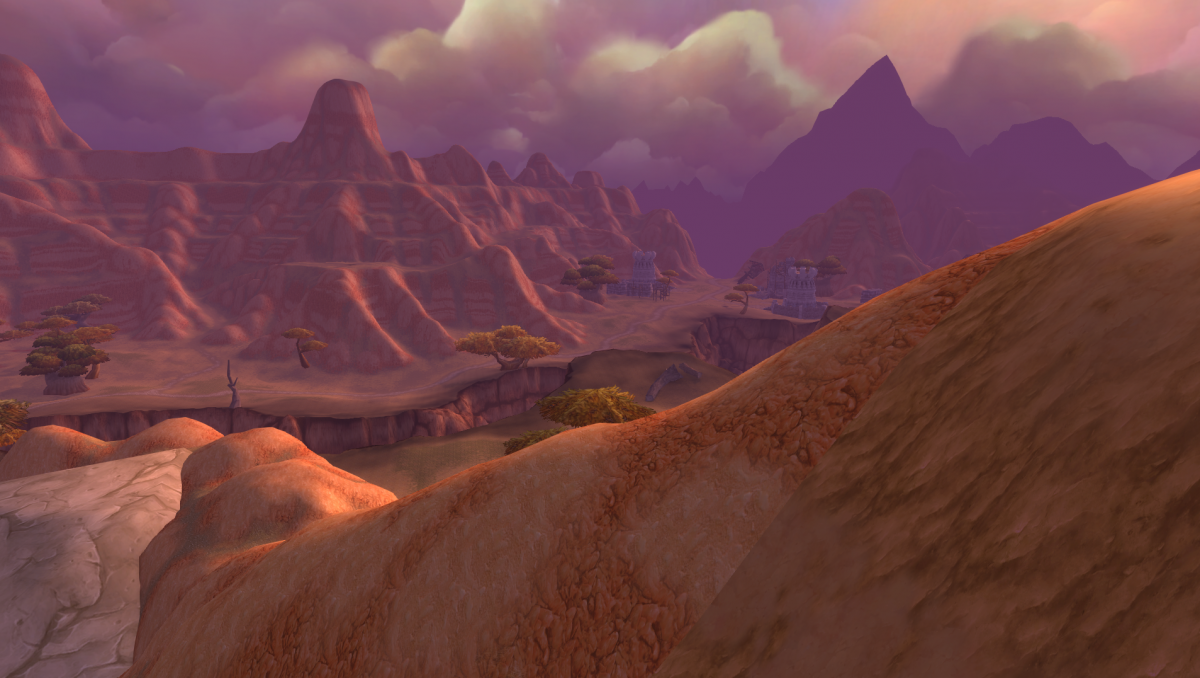
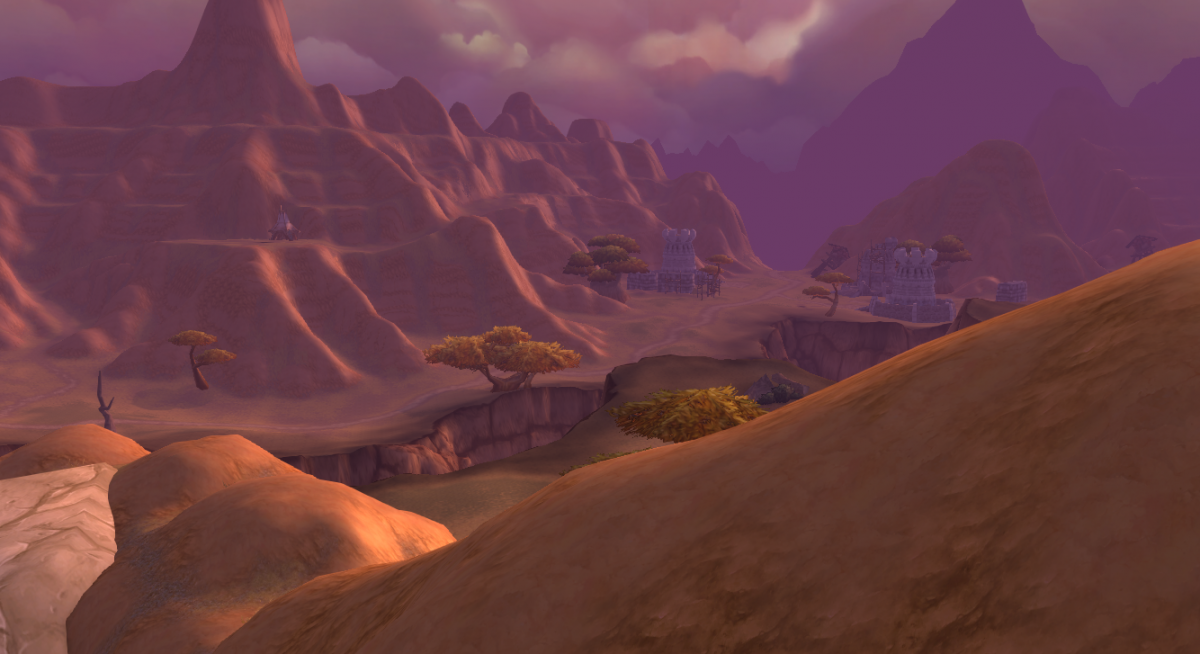
Phase texture shifting appears to break in some way in select ADTs bordering other zones. That's the only consistency I can find.
I think the specific combination is that one zone is doodad-shifted and texture-shifted and the other is not. The end result is this:
Note that the entirety of Southern Barrens is not texture shifted. It uses the same textures and tileset as Northern Barrens.
Using .gps f 300 or any distance to force-reload the zone (teleporting to another map or far enough away works, too) remedies the issue, but only for yourself.
Note that after doing this, Southern Barrens is texture-shifted again. This persists until you manage to undo the texture shifting (e.g. leaving the phase and teleporting to unload the texture shift), but is client-side.
Other people may still see the issue. It's more noticeable on more extravagant texture changes but I'm not at liberty to do that in this phase, as it's publically hosted.
-
please ive been looking forward to this for like 3 years now
-
A couple of things:
- The ability to make an option close out of the gossip window would be nice.
- Being able to make NPCs cast a spell on you via the gossip window would be cool as well, if possible.
- Adding to the above, it'd be great if you could use the gossip window to trigger NPC emotes via options or text boxes.
- Additionally, letting NPC gossips work like teleporters would be nice, too. It'd fill the same niche as gob teleporters in a way, but talking to transport NPC to teleport somewhere is more immersive imo than talking to the wagon or a book.
- I don't know if this is the right place for this suggestion, nor how much effort it would take, but an addon for an interface to make the gossip creation process a bit less painful would be well-appreciated by anyone who works with that system a lot.
-
In the wake of the other guide being made in 2017 and only having been updated for gossip options, I decided to write my own.
THE NPC PHASE FORGING GUIDE
9600 RTXENABLED
Chapter I
Creation & Outfitting
To begin with out quest to create an NPC, we should familiarize ourselves with the commands. All NPC creation commands for phase-forged NPCs (that is to say, NPCs with custom, hand-made appearances) are subcommands for the .phase forge npc line of commands.
Creation
To create an NPC, use this command:
.phase forge npc create
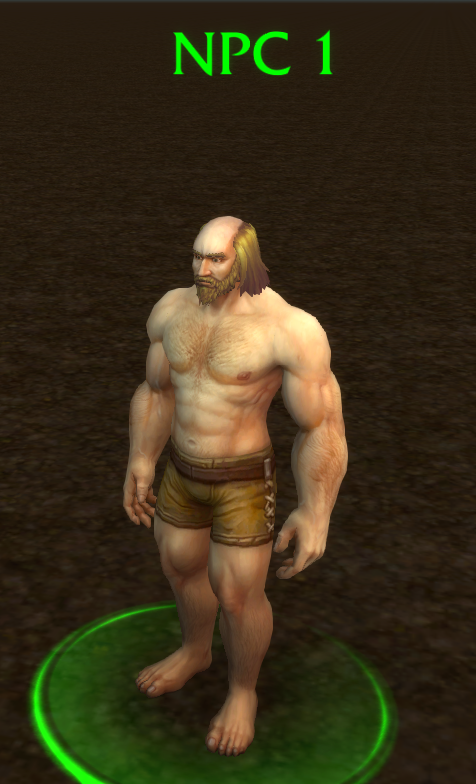
Congratulations! You've made a template NPC with an outfit. This is useful for creating NPCs with custom armor. Without any gear or customization, your made NPC, once spawned, will look something like this:
This NPC has no customization at all.
Now, how to customize this strapping young man? There is a variety of ways to approach this, and the easiest one for baseline customization involves the Epsilon addon. Everyone should have this installed & enabled by default. Find the
icon on your minimap and open it up. Now, transition to the NPC forge.
Once you're in the forge, your window should look something like this.
The NPC forge allows you to change most customization parameters. It effectively does the same job as the commands .ph forge npc outfit skin/face/hairstyle/haircolor/facial, but allows for faster and less painful changes.
Here, you can change everything pictured on your outfit. Let's give this guy, for example, a different skin, face, beard, and hairstyle. Do this how you want.
I ended up with this result.
Now, there are some customization options that cannot be accessed with the Epsilon addon. These customization options are called features, and usually involve miscellaneous options such as the posture on an orc, or tattoos on a Night Elf demon hunter. To access these features, use this command family:
.ph forge npc outfit feature 0/1/2 #
The feature slot goes from 0 to 2. The second number is the option within this slot.
To find out what this does exactly, you can change features on humans as well. Try this now, by setting feature 1 to 2, and feature 2 to 5.
Your NPC should look like this, now.
As you might expect, outfitted NPCs have all the options that character customization offers, so the Epsilon addon's GUI makes it much easier to traverse the upwards of 50 hairstyles some races have.
Outfitting
Now that you've made an NPC with something more than the basic customization, it's time to throw some armor on him, eh? Easy enough! To equip armor manually, which I don't recommend, you use this command:
.phase forge npc outfit equip #itemID/[itemLink]
The term itemID and itemLink are stand-ins. Replace them with the item's entry ID or the link acquired through a shift-click.
To unequip an item, simply type this command:
.phase forge npc outfit unequip<SLOT>
Applicable slots are all, head, shoulders, body(for the shirt), chest, waist, legs, feet, wrists ,hands, back, and tabard.
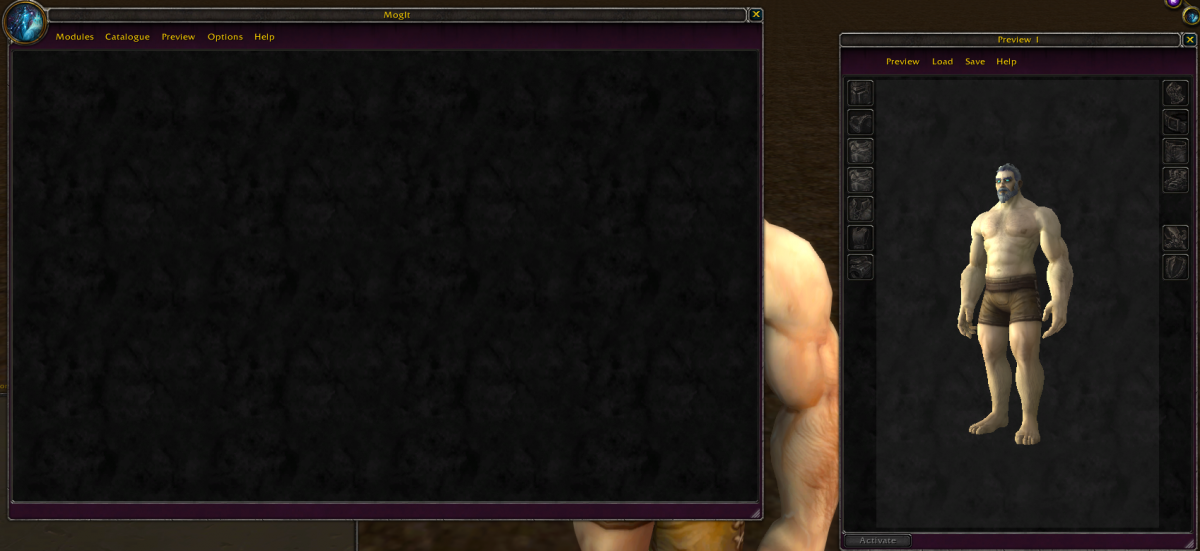
Now, you may wonder why I don't recommend the command-line. That's because there's a much superior way of equipping armor onto an NPC: The MogIt Preview Window!
As a part of the EpsilonWoW client, MogIt was modified to accommodate for NPC outfitting as well as the custom items for Epsilon. To open the preview window, Right-Click the
button on your minimap. To open the main window, Left-Click it.
MogIt was heavily modified for Epsilon. These modifications make it very useful for what we're about to do.
Now, make an outfit. Open the modules, put together a set of any kind, do what you want. To keep things simple, I've taken one of the many outfits I've made and turned it into a link:
[MogIt:5YY;5XW;4P3;5ZQ;5Gd;xGDq;BQOn;4YF;cDJt;pLmQ;3hS;G3ML:10:0]
Copy this link and paste it into your chat-box to link the MogIt set. Click the link to open the preview window.
Once you've opened this link, you should have a preview window open. The set should look like this:
This is a wacky set.
Now that you have the set open, navigate into the Preview section like so:
Now, when you have your NPC selected, click Equip NPC With Items and a LUA function should automatically slap the set on.
The process should look like this.
Now, you might wonder: Where the heck are his weapons?!
Unfortunately, the MogIt function doesn't equip NPC weapons as of the creation of this thread. Instead, you'll have to do this manually via this command:
.phase forge npc weapon #itemId/[itemLink] 0/1/2
The number after the item is the slot. 0 corresponds to main-hand; 1 to off-hand; and 2 to ranged weapons. Shields may only work in the off-hand slot, and ranged weapons are best used in the ranged slot.
Now that our homunculus is armed and dangerous...
You can set the sheath of a forged NPC with .phase forge npc sheath. 0 is sheathed; 1 is unsheathed melee; and 2 is unsheathed ranged.
... It's time to give him a name. Use this command for that function:
.phase forge npc name <name>
I named him goober. I hope you like him. : )
This is it! You've made your first unique NPC! Congratulations! Now nothing could possibly sta
Chapter II
Generic NPCs
Now, you've made an NPC. Great. You know the basic jist of using the functionality as seen above. But, there are some cases where you need an NPC that looks generic, such as a guard or an unnamed civilian, but you can't give them a helmet or a mask! Don't worry, I've got your back.
To begin with, here is a starting resource for this exercise:
MogIt set:
[MogIt:8oWr;xCVk;BN2w;tp5G;pcoI:10:0]
.phase forge npc outfit race 3
Your NPC should look like this after you create him and set his race.
Now, let's get to work. Above, I detailed how to use the Epsilon addon to set skin colors. It does this by automatically inputting the chat command for you. The commands to change different attributes are as follows:
.phase forge npc outfit race | This sets the race. If you type the command in without a number, you will get a list of every race.
.phase forge npc outfit skin | This sets the skin value. Every skin color visible in character creation is applicable here. Do note that the first skin option is valued 0, so if you wanted skin 9 for a human, you would type in .phase forge npc outfit skin 8.
.phase forge npc outfit face | This controls the face texture and shape. You cannot change these independently, but on NPC skins without face textures, the face will still look slightly different.
.phase forge npc outfit facialhair | This sets the NPC's facial hair, or in most female models' cases, the jewelry.
.phase forge npc outfit hair | This sets the hairstyle.
.phase forge npc outfit haircolor | This sets the hair color.
.phase forge npc outfit gender | this sets the NPC's gender, via male or female.
.phase forge npc outfit feature | This sets the feature slot of an NPC.
Now, to use these effectively for a generic NPC, you want multiple different values. To try this, do the following:
.phase forge npc outfit skin 0 1 2 3 4 5 6
.phase forge npc outfit face 0 1 2 3 4 5 6
.phase forge npc outfit hair 0 1 2 3 4 5 6
.phase forge npc outfit haircolor 0 1 2 3 4 5 6
.phase forge npc outfit facialhair 0 1 2 3 4 5 6
Adding multiple values after another allows the outfit to randomly choose between the given values.
After you do this, your NPC should look a little different. Spawn more of him, though, and behold:
Different, generic-looking folks! Now, you might want to name the NPC as usual, but wait, because there's
Multiple Outfits
Yeah, that's right, you can have multiple outfits on the same NPC. Why is this useful? Sometimes you want different-clothed generic civilians. Sometimes you might want to have a male and a female guard NPC. How do you do this? Easy! First, copy the outfit like so:
.phase forge npc outfit copy
The chat should spit out a message giving you the ID of your new outfit.
Now, make sure to force one of the NPCs to use that outfit. Because you copied it, it has all the values and options of your existing outfit already set. Use this command:
.phase forge npc outfit set #outfitID
#outfitID is a stand-in. Use the 8-or-more-digit number from the chat message.
Once you've set the outfit, set the selected NPC's gender to female, and voilá! You've got a man and a woman citizen. But what's this? Everyone's named Man! Not just the men, but the women
and the children too!There are three different naming commands for NPCs.
To remedy this, use these commands when using NPCs with two different gendered outfits or displayIDs:
.phase forge npc malename <MaleName>
.phase forge npc femalename <FemaleName>
This will give the NPC a different name depending on whether you've spawned a male or female NPC.
That sums it up for this. But, there's another caveat! It's
DisplayIDs
You can add, remove, and list DisplayIDs on an NPC by using these commands:
.phase forge npc displays add <displayID>
.phase forge npc displays remove <slotID>
.phase forge npc displays list
the slotID is shown with the list command.
You can use these commands to add a creature's displayID to your NPC, like I've done here:
That's all.
-
WHAT DOES THIS MEAN!!!!!!!!!
It'd be cool to have a command for .npc set or .ph forge npc set to make npcs dead. That is to say, set their health to 0 and make their names gray on spawn or indefinitely. I'm pretty sure .kill will eventually despawn and respawn the npc (i'm not 100% sure about this) and reset upon server restart.
-
basically:
If it's possible, a way to add multiple phase spawns or designate an area as the "Phase Spawn" to have people spawn in a randomly select spawn or a random spot in a given area.
Would be nice to de-intersect players in a spawn area or make it seem like people are in a certain area without spawning inside of each other.
-
agreed
i think we should either get a new start zone temporarily until nomi (which if i get it right would alleviate the lag issue?) gets finished or we get a new start zone period that's either made from scratch or a remote map somewhere
i recall it being possible to make maps in noggit and upport them to bfa so doing that sans water and adding it thereafter is something that could be done no?? idk i never used noggit it scares me
-
-
A simple patch to get rid of the red star remaining behind after Argus's portal was closed. Useful if you don't want the effect or are RPing in a phase preceding it.
To install:
Install via the launcher by adding the RedStar_Remover.zip file.
-
i believe they're not doodads, but actually part of the wmo model
-
-
It'd be cool to expand the functionality for formations by letting you use an additional variable to, for example, trigger .npc emotes on an entire formation if you're selecting a member or leader of it. Something like .npc emote 333 r formation would let you make everyone in that formation hold a combat stance. It'd make it easier to DM large groups of NPCs! ?


TRP troubles and language selection
in The Bug Box
Posted
this happens because the font used in the tooltip (Friz Quadrata Std if I'm correct) doesn't have any unicode characters in it: this means that anything outside of the base latin alphabet plus a very small amount of extras will be replaced with a ?
how to fix it? i have no idea i but i guess if you replaced the tooltips' font locally in the WoW folder, you could work around the problem